
GitHub Pages is a fantastic platform to host a static website, and it’s even better when you can add your custom domain to it. Adding a custom domain gives your website a professional look and makes it easier for users to find. In this guide, we will cover how to add a custom domain to your GitHub Pages website step by step.
Prerequisites
Before you start, you need to have the following:
- A GitHub account.
- A repository for your GitHub Pages website.
- A custom domain purchased from a domain provider.
Step 1: Verify Ownership of Your Domain
You must verify that you own the domain to add a custom domain to your GitHub Pages website. You can add a specific file, called a DNS record, to your domain’s DNS configuration. The process is different for different domain providers, so we’ll include detailed guides for some of the most popular providers.
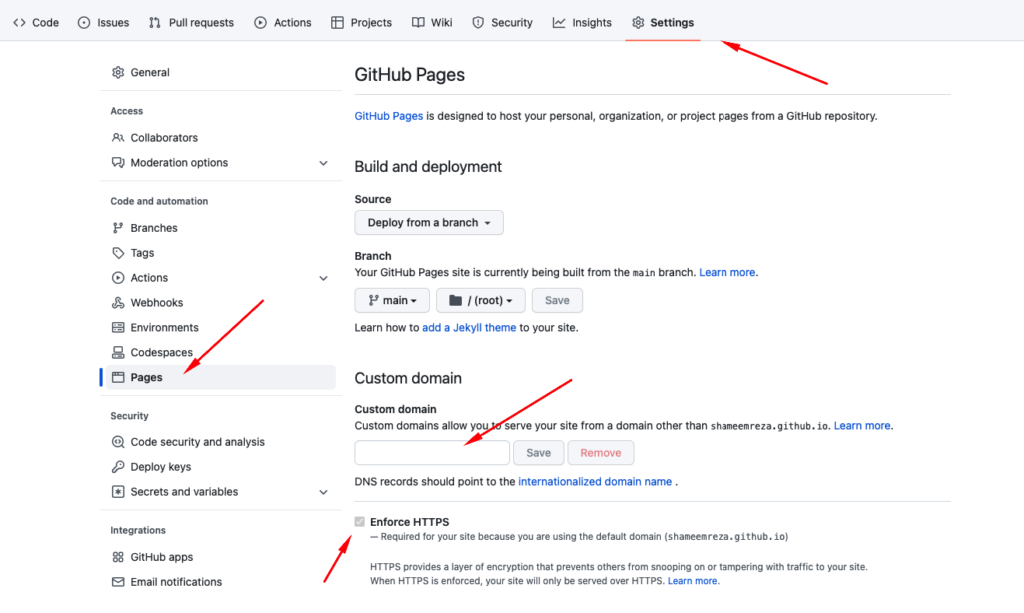
Step 2: Add Your Custom Domain in GitHub
Once you’ve verified ownership of your domain, you can add your custom domain to your GitHub Pages website. To do this, you need to go to the repository settings of your GitHub Pages website and add your custom domain under the “GitHub Pages” section.
Step 3: Add a CNAME and A Record
A CNAME and A record is a DNS record that tells visitors to your website where to find your content. To add a CNAME and A record, you need to access your domain’s DNS configuration and add a record that points to your GitHub Pages website. The exact process for adding a CNAME and A record is different for different domain providers, so be sure to follow the instructions specific to your provider.
Also, it is recommended to check GitHub’s official guide for the updated IPs for the A record.
Specific Guides for Different Domain Providers
Here are specific guides for adding a custom domain to your GitHub Pages website for some popular domain providers:
GoDaddy
-
- Log in to your GoDaddy account.
- Select your domain from the list of domains.
- Go to the “DNS Management” page.
- Add A records:
185.199.108.153
185.199.109.153
185.199.110.153
185.199.111.153
- Add a CNAME record with the following information:
- Host: www
- Points to: {username}.github.io
- Save the changes.
Namecheap
-
- Log in to your Namecheap account.
- Select the domain you want to use with GitHub Pages.
- Go to the “Advanced DNS” section.
- Add A records:
185.199.108.153
185.199.109.153
185.199.110.153
185.199.111.153
- Add a CNAME record with the following information:
- Host: www
- Points to: {username}.github.io
- Save the changes.
HostGator
-
- Log in to your HostGator account.
- Select the domain you want to use with GitHub Pages.
- Go to the “Advanced DNS” section.
- Add A records:
185.199.108.153
185.199.109.153
185.199.110.153
185.199.111.153
- Add a CNAME record with the following information:
- Host: www
- Points to: {username}.github.io
- Save the changes.
Step 4: Wait for DNS Propagation
Once you’ve added your custom domain and CNAME record, you need to wait for the changes to propagate. This can take anywhere from a few minutes to 24 hours. You can check if the changes have been propagated by using a tool like DNSChecker.
Conclusion
Adding a custom domain to your GitHub Pages website is a straightforward process that can take your website to the next level. Following the step-by-step guide in this article, you can add a custom domain to your GitHub Pages website and give your users a professional and easy-to-remember address to access your website. Don’t forget to follow the specific instructions for your domain provider to ensure a smooth process. Good luck!